Sitecore Rocks is an amazing tool that allows you to do a large amount of tasks from Visual Studio. In the last article about Creating a Sitecore Instance Using Sitecore Rocks that we can install Sitecore Packages right from inside Visual Studio. There is also a Product from Hedgehog called Team Development that will simplify the deployment of your solution. However, sometimes you cannot use Sitecore Rocks to install Sitecore Packages or Hedgehog's Team Development for Deployment either for Security reasons or some other good reason. If this happens, here is an alternative means to install a Sitecore Package.
Step 1: Open the browser and navigate to {website root}/sitecore/login
Make sure you click on options to show login options and click on desktop. Enter the username and password and click login

Sometimes when you click login you may get this message, "Access to the path 'c:\inetpub\wwwroot\sitecorequickstarts\website\sitecore\shell\applications\debug' is denied.". The solution is to go to open Windows Explorer and navigate to the project directory (eg. c:\inetpub\wwwroot\sitecorequickstarts) and right click. Click on properties. There will be a user called IIS_IUSR_{something} Ensure this user has full control of the site and click apply.

Step 2: If you have access to the server Sitecore Folder you can save yourself some time. Sitecore Packages are stored in the data\packages folder underneath your Sitecore Instance. eg. c:\inetpub\wwwroot\sitecorequickstart\data\packages
You can copy all your packages to this folder using windows explorer. This will avoid possible upload issues with the browser. If you have copied the packages then you can bypass all the upload steps and go directly to Step 12.
Step 3: Click on the Sitecore menu then click on Development Tools then Installation Wizard.

Step 4: When the wizard comes up click next

Step 5: If you copied all the packages to the package folder you can skip to Step 11.
If you have not uploaded the package yet then click upload. This will launch the upload wizard.

Step 6: Click next

Step 7: Click on Choose File

Step 8: Choose the package to upload and click OK

Step 9: You will see your package listed. If you have more packages you could choose to pick additional files. When done click next.

Step 10: If you are re-uploading any packages then ensure you check overwrite existing files and click next.

Step 11: The package gets uploaded and then tells you its done. Click Finish.

Step 12: Click on browse


Step 14: You will see the name of your package in the textbox click next

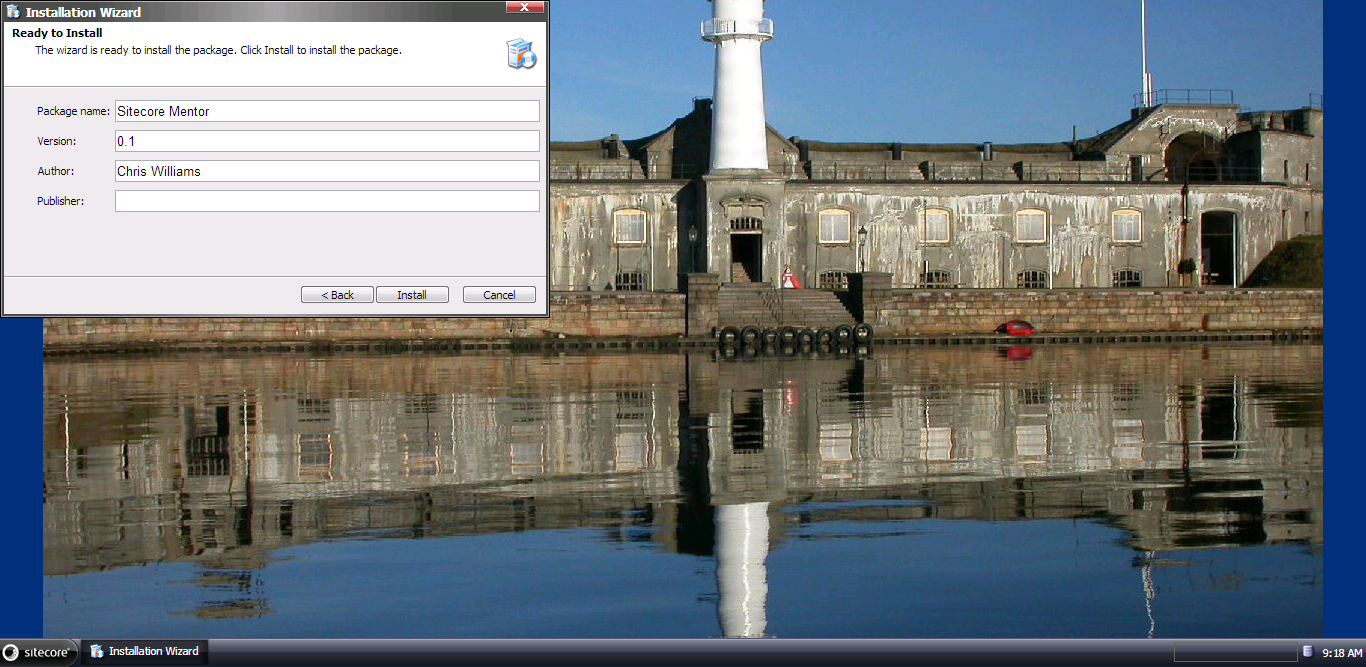
Step 14: Sitecore will provide you with information to confirm its the right package. If it looks right click Install.
Step 15: Sitecore will install the content tree and physical files.

Step 16: If this is a new package it will probably install without prompt, however if this is an update you may get prompted for additional decisions on how to deploy the package. If the install starts but then the screen goes grey and you get nothing. Possibly popup blockers are turned on. In chrome that is in the top right corner by the address bar.

You may be prompted to replace physical files. Choose yes or no based on the file being overwritten.


Step 17: After Sitecore has completed installation of the package you will be prompted to restart Sitecore Client and or Sitecore Server. In most cases a Sitecore Client Restart is fine. If you require a sitecor Server Restart, then the provider of the package will probably notify you.

Sitecore Packages can make it really easy to install new components but extra care needs to be taken especially with content tree updates as it is really easy to accidentally remove or overwrite existing values.
I highly recommend that you take a look at Hedgehog Team Development for your deployment needs but it is nice to know you have an alternative to lean on when the need arises.
If you have any suggestions for a QuickStart or a tip, trick or resource that would help someone starting out with Sitecore, please email them to me at sitecoreguild@outlook.com
No comments:
Post a Comment